Radiant Heat – The Heating System of Choice for New Construction Projects With the emphasis on renewable energy and enhancing the efficiency of our homes nowadays, it’s no wonder that radiant heat is fast becoming the heating system of choice…
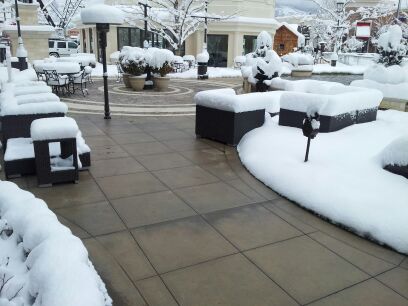
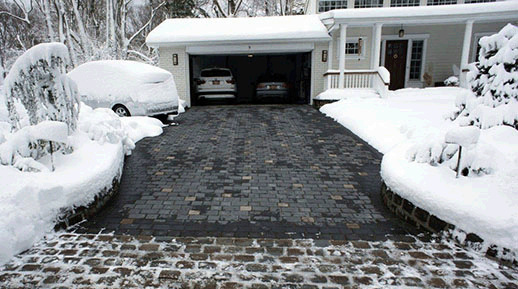
Custom Heated Driveways, Sidewalks and more Warmzone has been designing snow melting systems for a wide variety of applications for almost two decades. From commercial parking structures and residential driveways to sidewalks, steps and even runaway truck ramps, we’ve provided…
Roof Gutter Trace Systems Self-regulating Heat Cable for Gutters, Downspouts, Valleys and More During the winter months many homeowners scramble to find a way to protect their roof gutters from heavy ice buildup. Icicles can also form, creating dangerous conditions for…
Unmatched Support and Design Services – Reasons why Warmzone Heated Driveway Systems are Better than any Other When shopping for a radiant snow melting, floor heating, or roof deicing system, there are several factors to take into consideration to ensure that…
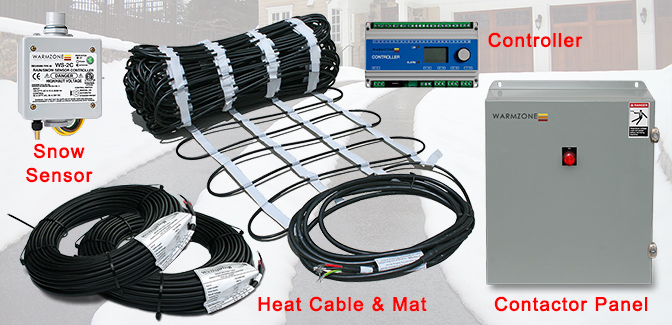
A Look Behind the Making of a Great Snow Melting System Radiant heat snow melting systems are easy to customize and can be installed in just about any time of medium and application. Snowmelt systems are versatile and can be…
Deal With Pros who Care About Your Installation You’ve just made an investment in your property and purchased your first state-of-the-art radiant heat system from Warmzone, and you may be wondering, what comes next? Installation is the next step, and…
Helpful Roof Information Most weather related issues for a home begin – or end – with the roof. So, it’s no exaggeration to state that the single most important physical characteristic of a house may be its roof. Trouble areas…
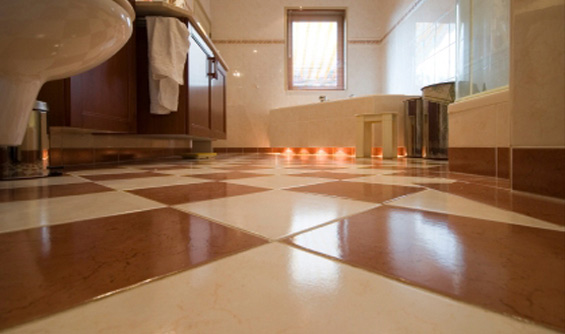
Radiant Floor Heating Nowadays consumers are not only concerned with saving money, but about doing their part to minimize their carbon footprint and help protect the environment. Perhaps it is these factors that have contributed to the steady growth of…
Radiant heat has recently come into the spotlight as an efficient and cost friendly method to heat almost any area. It is a product for both businesses and consumers that allows safety, flexibility, and comfort. From interior applications like heated…
Purchasing a snow melting system for your personal or commercial property is an important investment that can increase your property value. Radiant heat systems are versatile and easy to customize so they can be installed in most mediums, including concrete,…
We use essential cookies to ensure the site functions properly. We also use optional cookies to improve your experience. You can see our cookie policy for more information and manage your preferences.
Functional
Always active
The technical storage or access is strictly necessary for the legitimate purpose of enabling the use of a specific service explicitly requested by the subscriber or user, or for the sole purpose of carrying out the transmission of a communication over an electronic communications network.
Preferences
The technical storage or access is necessary for the legitimate purpose of storing preferences that are not requested by the subscriber or user.
Statistics
The technical storage or access that is used exclusively for statistical purposes.The technical storage or access that is used exclusively for anonymous statistical purposes. Without a subpoena, voluntary compliance on the part of your Internet Service Provider, or additional records from a third party, information stored or retrieved for this purpose alone cannot usually be used to identify you.
Marketing
The technical storage or access is required to create user profiles to send advertising, or to track the user on a website or across several websites for similar marketing purposes.