Deal With Pros who Care About Your Installation You’ve just made an investment in your property and purchased your first state-of-the-art radiant heat system from Warmzone, and you may be wondering, what comes next? Installation is the next step, and…
Radiant heat has recently come into the spotlight as an efficient and cost friendly method to heat almost any area. It is a product for both businesses and consumers that allows safety, flexibility, and comfort. From interior applications like heated…
Purchasing a snow melting system for your personal or commercial property is an important investment that can increase your property value. Radiant heat systems are versatile and easy to customize so they can be installed in most mediums, including concrete,…
The Ideal Time to Install Radiant Heat Even though spring is just rubbing its eyes and beginning to stir, this is actually a great time to prepare for the next winter by installing a radiant heat system. Early bird discounts…
Finding the Right Snowmelt System Components and Services Winter can be a treacherous time for business and homeowners when it comes to navigating the icy driveway, parking areas, and sidewalks. The best way to ensure safety around your house or…
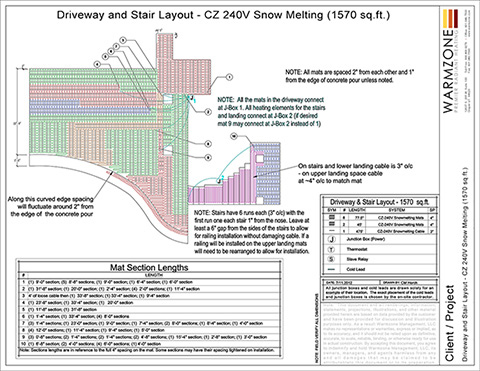
Key Takeaways Start with accurate measurements: Determine the square footage of the area to be heated. Warmzone can assist using satellite software or on-call support to ensure proper system sizing. Custom system design matters: Warmzone provides detailed layouts considering your…
Radiant Heat Experts Offer Key Advise and Tips on What NOT to do When Installing Radiant Heat Radiant heat systems work. It’s a proven technology that produces impressive results. But like most technology related products, if a radiant heat system isn’t…
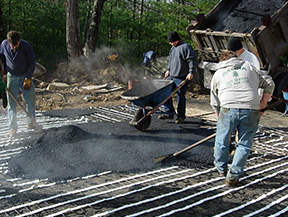
Installation Tips for Installing Snow Melting Heat Cable in Asphalt (Quick Reference Guide – Article 1 in a Series of 3) Remember to check the element resistance and the insulation resistance of the heating cable/mat at the recommended intervals: In the box: Write the…
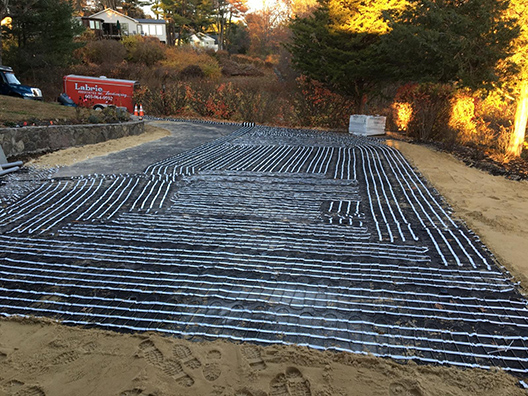
Installation Tips for Installing a Snow Melting System in Concrete (Quick Reference Guide – Article 2 in a Series of 3) Remember to check the element resistance and the insulation resistance of the heating cable/mat at the recommended intervals: In the box: Write…
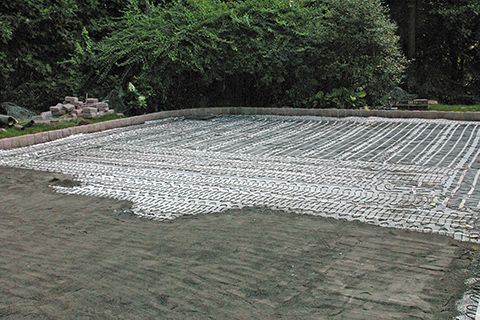
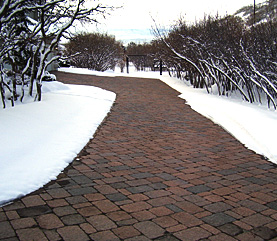
Installing Heat Cable under Pavers (Quick Reference Guide – Article 3 in a Series of 3) Remember to check the element resistance and the insulation resistance of the heating cable/mat at the recommended intervals: In the box: Write the values…
We use essential cookies to ensure the site functions properly. We also use optional cookies to improve your experience. You can see our cookie policy for more information and manage your preferences.
Functional
Always active
The technical storage or access is strictly necessary for the legitimate purpose of enabling the use of a specific service explicitly requested by the subscriber or user, or for the sole purpose of carrying out the transmission of a communication over an electronic communications network.
Preferences
The technical storage or access is necessary for the legitimate purpose of storing preferences that are not requested by the subscriber or user.
Statistics
The technical storage or access that is used exclusively for statistical purposes.The technical storage or access that is used exclusively for anonymous statistical purposes. Without a subpoena, voluntary compliance on the part of your Internet Service Provider, or additional records from a third party, information stored or retrieved for this purpose alone cannot usually be used to identify you.
Marketing
The technical storage or access is required to create user profiles to send advertising, or to track the user on a website or across several websites for similar marketing purposes.