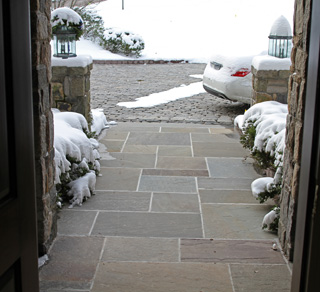
Solution: ClearZone Snow Melting System Best thing I ever invested in. I think about you every time it snows, and how you guys are cleaning my north exposure sidewalk before anyone in the neighborhood! The application of installing it under…
Increasing Profitability While Reducing Liability The car wash industry boasts annual revenue of approximately $5.8 billion. That’s a large pie to be sure, but with over 113,000 automated and self-serve car wash facilities vying for a slice, the pickings can…
Keep Your Decorative Concrete Looking Like the day You Installed it! When installing decorative concrete, the installer can’t help but wonder, “How long is my work going to last?” One concern may be that in the winter the owners will…
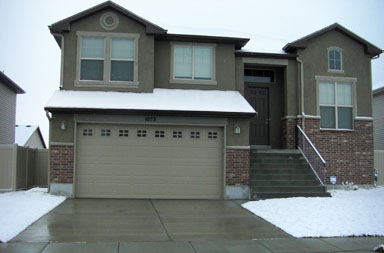
Ramping up for Winter: Prepare for the White Stuff with a Radiant Snow Melting System If the recent heat wave is any indication of what winter will be like, an electric radiant heated driveway installation now is great preparation for big…
Heated Driveways are Fully Automated and Easy to Operate A heated driveway is becoming more of a necessity every passing winter. More of us are moving to the outer areas of our cities to find more affordable housing. Often those…
Most municipalities in cold weather climates across the U.S. have snow removal ordinances. If homeowners fail to remove snow and ice from their sidewalks in a timely manner, citations / fines are often the result, adding insult to injury. Here…
Warmzone Moves Headquarters to Larger Facility Salt Lake City, Utah (PR WEB) – March 2, 2012 – Warmzone, a leading provider of radiant heat solutions has announced that it is moving its corporate headquarters from downtown Salt Lake City to…
Radiant Heated Driveways Boast Many Perks Seriously people, what’s not to love about having a heated driveway leading to your domicile? You literally say goodbye to back breaking snow removal after ever single snow storm for the rest of your life. You…
Cut Snow Removal Labor Costs and Increase Pedestrian Safety with Radiant Heat Most of us may associate a radiant snow melting system with a heated driveway. Why not apply the same smart technology that comes in a snowmelt system, to a sidewalk? Pedestrian…
Radiant Heated Driveways Make Snow Removal So Simple Every day it snows millions of us curse its accumulation. We point our fist to the sky, shaking it with fury and scream WHY? ENOUGH ALREADY! MAKE IT STOP!!! It’s not that…
We use essential cookies to ensure the site functions properly. We also use optional cookies to improve your experience. You can see our cookie policy for more information and manage your preferences.
Functional
Always active
The technical storage or access is strictly necessary for the legitimate purpose of enabling the use of a specific service explicitly requested by the subscriber or user, or for the sole purpose of carrying out the transmission of a communication over an electronic communications network.
Preferences
The technical storage or access is necessary for the legitimate purpose of storing preferences that are not requested by the subscriber or user.
Statistics
The technical storage or access that is used exclusively for statistical purposes.The technical storage or access that is used exclusively for anonymous statistical purposes. Without a subpoena, voluntary compliance on the part of your Internet Service Provider, or additional records from a third party, information stored or retrieved for this purpose alone cannot usually be used to identify you.
Marketing
The technical storage or access is required to create user profiles to send advertising, or to track the user on a website or across several websites for similar marketing purposes.