Installation Tips for Installing Snow Melting Heat Cable in Asphalt (Quick Reference Guide – Article 1 in a Series of 3)
Remember to check the element resistance and the insulation resistance of the heating cable/mat at the recommended intervals:
- In the box: Write the values on the warranty card.
- After being laid out: Write the values on the warranty card.
- After being covered: Write the values on the warranty card.
- Record your readings in the installation manual.
- When laying out the cable, DO NOT allow heating cables to touch, cross, overlap or get bunched up. Minimum allowable spacing is 2 inches.
- Do NOT place asphalt that is higher in temperature than the cable’s maximum rated temperature on the heating cables.
- Heating cables should be securely fastened so they do not move or shift during the embedment process.
- Do NOT use a track application machine on the asphalt. Rubber tire applicators are okay as long as the asphalt temperature is below the maximum rated temperature for the heating cables.
- The operating weight of the asphalt roller should not exceed 1,000 pounds. (The heat cable is designed to handle 8.9kN before the insulation is damaged, which will cause the cable to fail.) NOTE: A walk-behind roller imparts a force of between 5-18 kN.
- Use a small power roller to compact asphalt over cable on sand, concrete, or ½-inch aggregate. A smaller roller will take more time, but decreases the chance of damaging the heating cable.
- A roller with 30 kN or less is allowable when heating cable is in concrete and the concrete is then covered is asphalt.
- When compacting/rolling on a grade, do not stop the roller. Stopping and resuming the roller may stretch and break the heat cable.
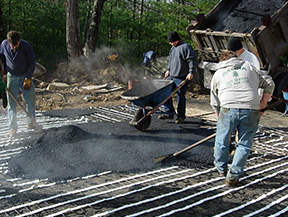
- Do NOT dump large quantities of asphalt on small sections of the heating cables. Doing this may cause damage to the cable because of excessive, focused heat. Ideally, the asphalt should be applied by hand.
- Do NOT cut or alter the heating cable. Mat tape may be cut, but the heating cable must never be cut.
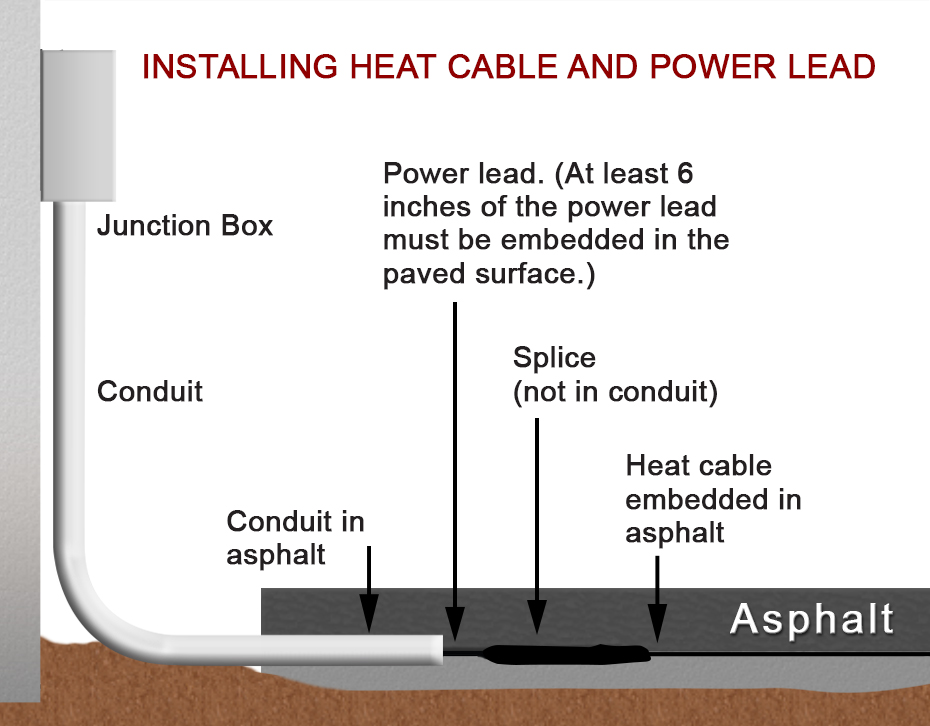
- Embed all of the heating cable and the splice in the asphalt. Allow asphalt to cool to a temperature of approx 212°F (100°C) before applying directly over the cable and splice.
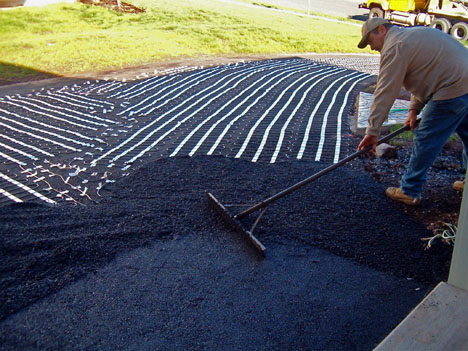
- Manually lay the asphalt and spread the material evenly around and over the heating cables.
- Heating cables are normally covered by 2-inches of asphalt. Leave a buffer of 4 to 6 inches of unheated asphalt around the edge of the heated area. This allows for adjustment of paving surface edges without damaging the heating cable.
- Handle heating cables carefully – use extreme care with tools such as shovels, rakes and wheel barrels to avoid damaging the cables.
- Verify cable integrity by checking resistance often during installation.
- It is important that the snow melting system be wired by a licensed, qualified electrician and in accordance with local laws, codes, regulations, and NEC guidelines.
- Ground sensors/cups should not be exposed to temperatures above 80°C (176°F).
- A perimeter of a maximum of 12 inches of asphalt should exist around the embedded cables. This allows for adjustment of the paving surface edge without damaging the heating cable.
* This list is intended as a general quick reference guide. It is NOT a substitution for proper training and following the installation manual. Always read and follow the installation manual. Web-based training is available on request.
For more information about installing heated driveways and snow melting systems, visit Warmzone’s Installation Overviews web page. Warmzone also provides a host of radiant heat installation videos online as well. Call us today for more information at 888.488.9276.