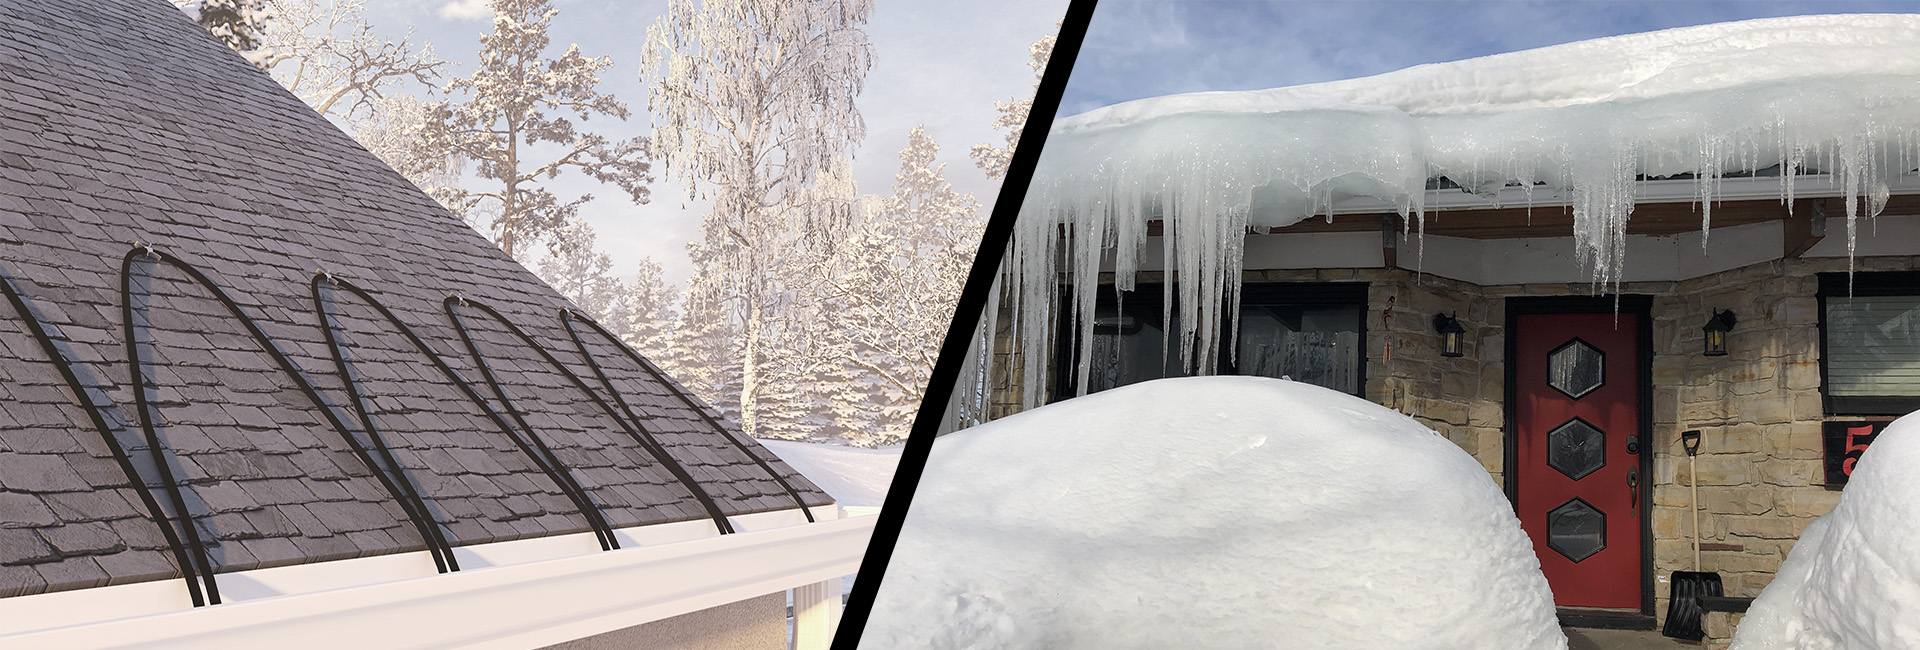
Installing a Radiant Snow Melting System
A radiant heated driveway is only as good as its installation, which is why it’s important to carefully follow best practices. As long as you remember a few simple tips, your snow melting system will be up and running in no time, and in good working order for years to come.
This may seem like a no brainer, but it’s important to make sure you have the right products for your installation before you lay one foot of cable. Before every job, remember to check the voltage and the wattage of the heating cable (usually indicated on the box). If you’re unsure, you can always contact Warmzone for confirmation and/or recommendations.
A key to successful installations is to use a megohmmeter to perform OHM tests of the heat cable before removal from the box, during, and after the installation. This can save you some headaches in the long run and help to ensure a successful install. Be sure to document the results in order to establish the manufacturer’s warranty.
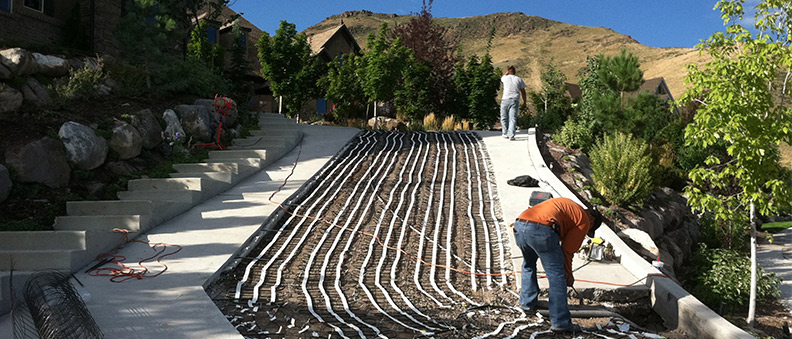
You have everything you need to construct the driveway of your dreams. Before you roll out any cable, here are a few rules to remember at installation time to prevent cable damage and get the most out of your system:
- Never cut, cross or overlap the heating cable. Heat cable should not be altered under any circumstances, as it may cause overheating, resulting in damage to the cable.
- Always embed the cable completely. Leave no air around the cable.
- Make sure to embed the factory splice (where the heating cable and power lead meet).
- Using a megohmmeter, perform OHM tests of the heat cable before removing the cable from the box, during the installation, and after the cable has been laid out.
- Always run the cold lead in conduit (power lead for the heating cable) – it is not direct burial.
For asphalt applications, snow melting cables are normally covered by two inches of asphalt. To prevent heat damage, the asphalt should be allowed to cool to 220°F. (105°C.) before pouring directly onto the mats or cables. Ground sensors/tubes should not be exposed to temperatures above 176°F. (80°C.).
And, for a proper sensor installation, both ground and aerial activation devices require a clear, 360-degree “view” of the sky to allow snow to fall onto the sensor plate. If drifting is an issue where the snowmelt system is being installed, it’s best to install a ground sensor.
For more installation tips, read our helpful Installation Overview web pages:
Installing Snow Melting Systems
How to Install a Heated Driveway (in Concrete)
Of course, you should always read the Installation Manual and follow instructions. Or you can always call Warmzone at 888.488.9276 for on-the-job installation support and service.
Installing Radiant Heat in Asphalt
Asphalt Heated Driveways
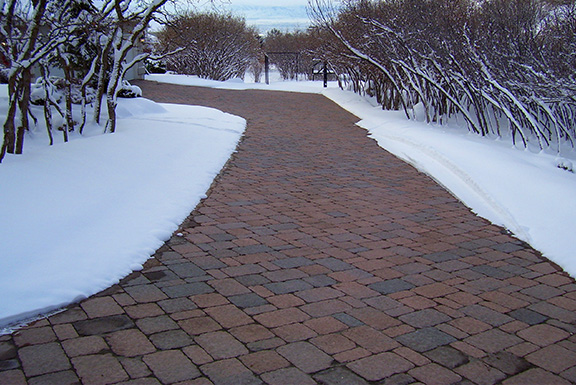
When you combine the durability of asphalt with the automated snow removal capabilities of a radiant heated driveway, you get a winner. Asphalt heated driveways feature energy efficient, maintenance-free operation to keep your driveway safe and clear of snow and ice. If you’re considering a new asphalt driveway, a refresh, or even if you’re already enjoying the benefits of asphalt, there’s still time to include a radiant heated driveway in your plans.
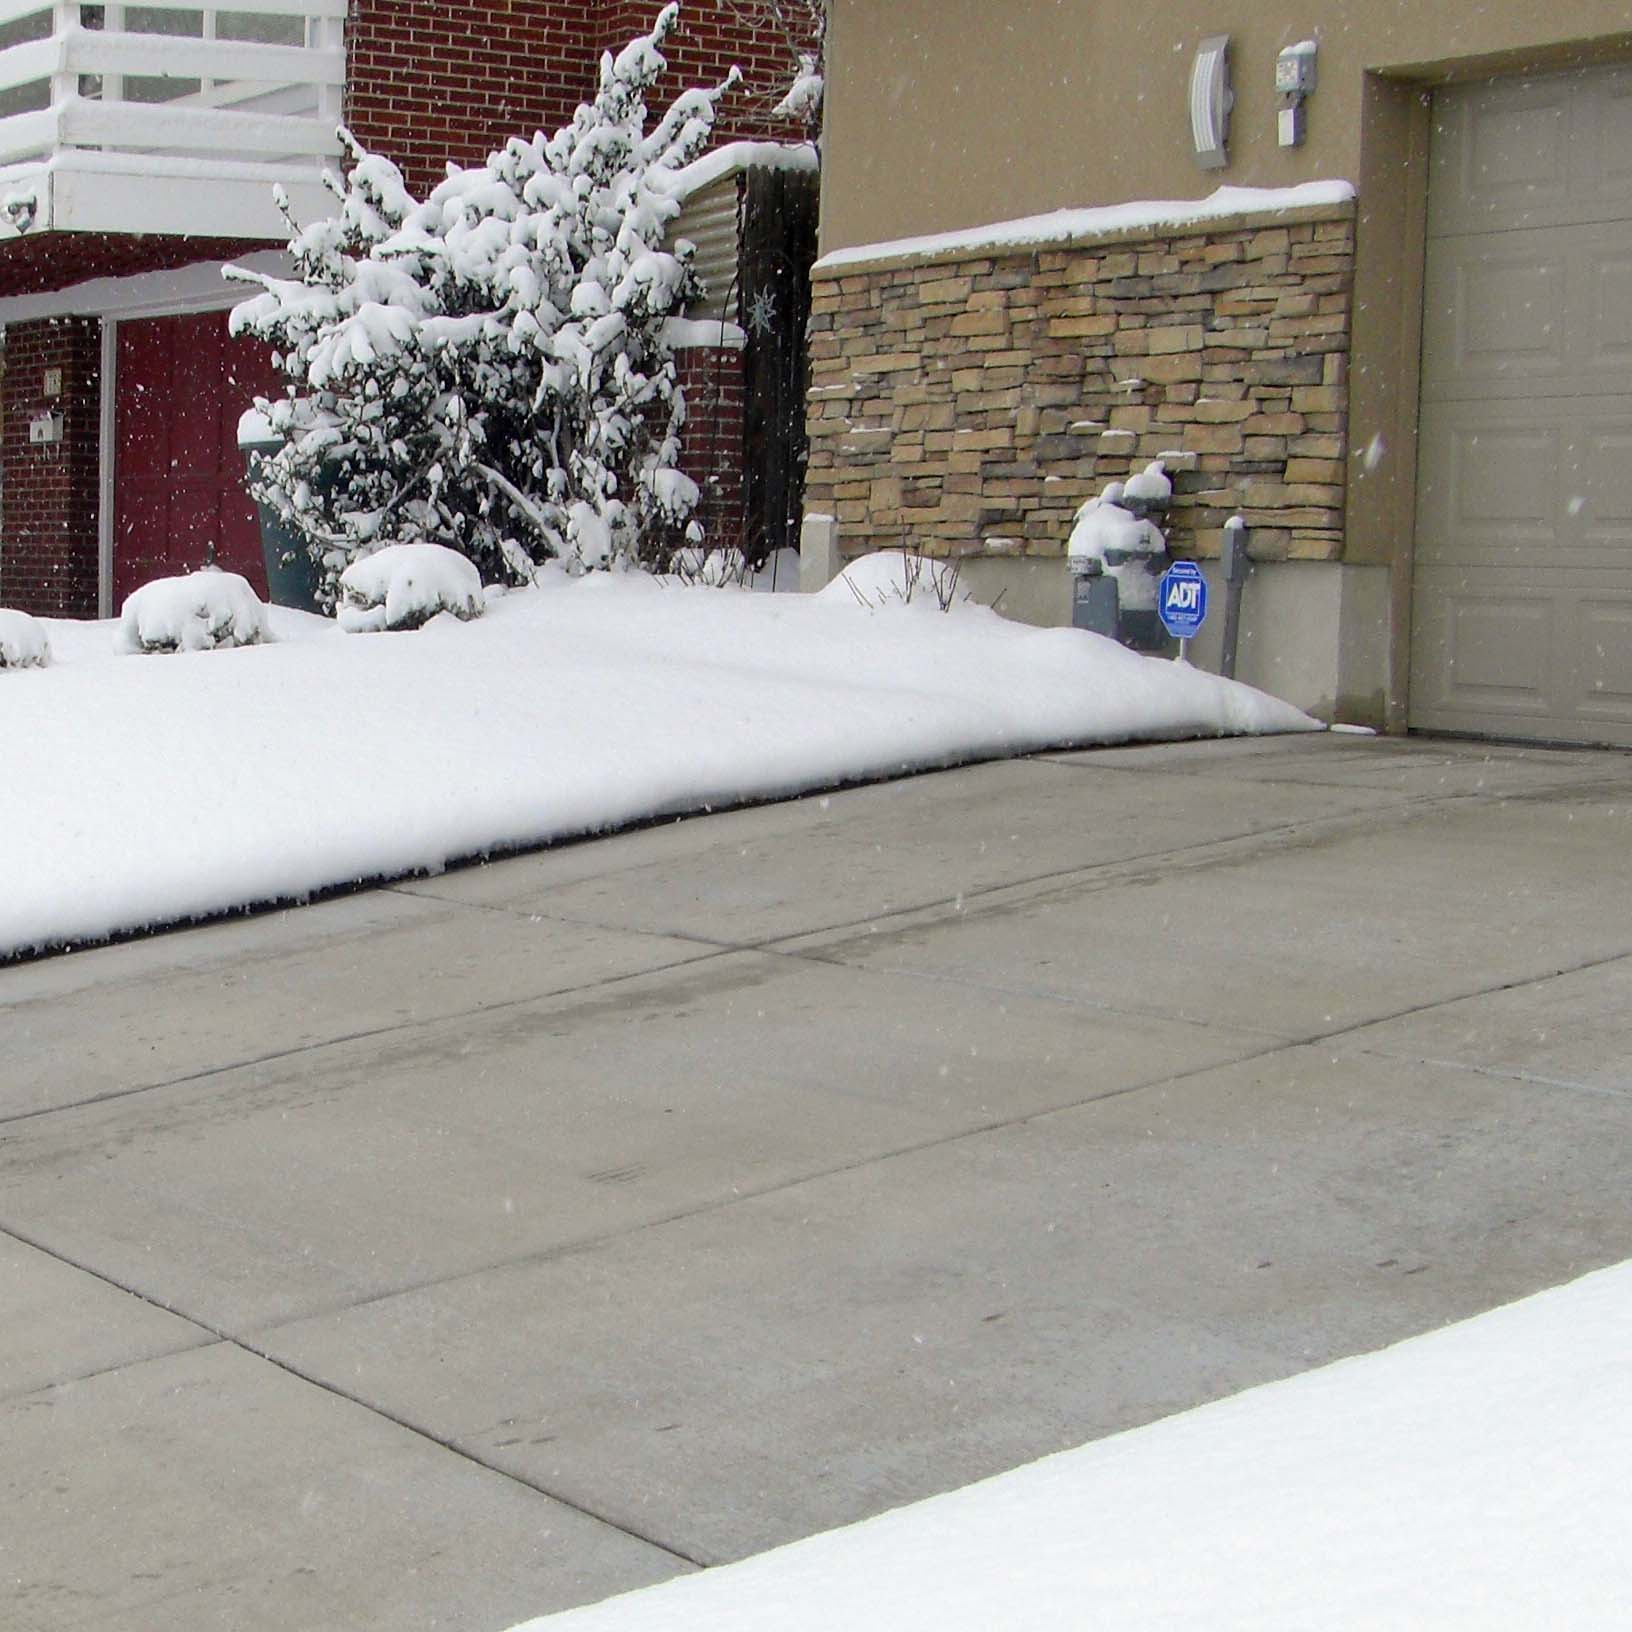
Radiant heated driveway in Denver, Colorado. Asphalt and heated driveway systems go together for several reasons. First, they are durable, and engineered to withstand extreme heat, freezing and thawing. They also adapt easily to the environment. Asphalt pavements flex and “give” with significant settlements of frost heave, while Warmzone snow melting systems respond to the weather, operating only when conditions indicate that snow is on the way.
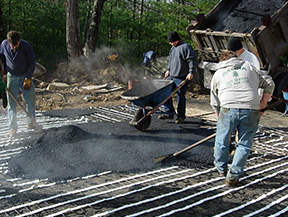
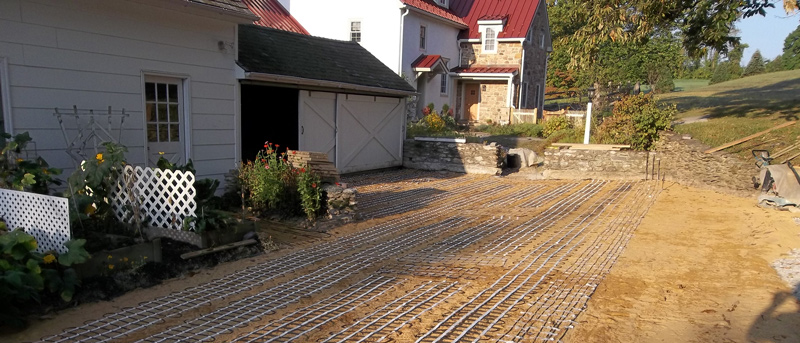
ClearZone heat cable is specifically designed to withstand the hot temperatures of new asphalt construction jobs. In the case of a new driveway install, the asphalt is spread directly over the rugged ClearZone heat cable and then compacted. In one day, you can have a new driveway and a fully operational snow melting system. The embedded, fully automated, radiant heat snow melting system provides a discreet, reliable snowmelt solution for your driveway.
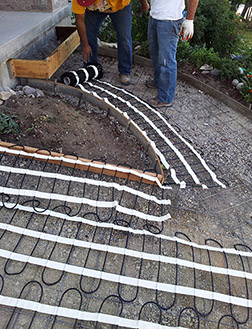
If you’ve already got an asphalt driveway, but it’s in sore need of repair, placing an overlay on the existing surface can be easily accomplished. As with the new pour, ClearZone snow melting cable can be installed just before the overlay. After a quick patch, a surface of about 2 inches is all you’ll really need for your driveway, and your new snow melting system installation.
If you’re not in the market for an asphalt refresh, no worries. Your existing driveway can be retrofitted with radiant heat. Grooves are cut in the existing asphalt, using asphalt saw-cut technology, and the heat cable is then placed in the freshly cut grooves. An epoxy topcoat is then applied as a sealant over the newly embedded cable. For additional traction and safety, a sand broadcast can be applied to the surface before the epoxy.
Fitted with a ClearZone snow melting system, an asphalt driveway is a cost-effective option for your home, and will last for years with only minimal maintenance. With radiant heat in the mix, you can also factor in all of the money you’ll save on snow removal services, snow melting chemicals and gas for your snow blower. And of course, there’s the gift of time. While your neighbors are out shoveling, snow blowing or tapping their watches waiting on their snow removal service, you’ll be in your car and on your way.
Need to do some more homework on this one? Learn more about the many options available by reviewing our website or call Warmzone today, at 888.488.9276. Receive a free quote for your radiant heating project.