Don’t get Caught Holding the Shovel next Winter — Install a Radiant Snow Melting System and Beat the Rush! With summer just around the corner, it’s a good time to spring for a new radiant heated driveway or walkway. Buying…
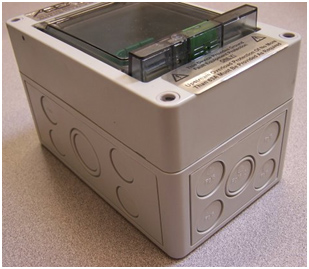
Warmzone Continues to Listen to Contractors and Serve the Needs of Homeowners Electric snow melting, roof deicing and outdoor pipe heating systems installed in the United States and Canada require ground fault protection for safe operation. In many cases, when…
Proven Radiant Heat Installers Gain Repeat Business from Warmzone Warmzone Connects Experienced Contractors with Customers to Deliver Top-notch Radiant Heat Installations As a contractor, are you interested in increasing your business? Are you looking for a radiant heat solutions provider you…
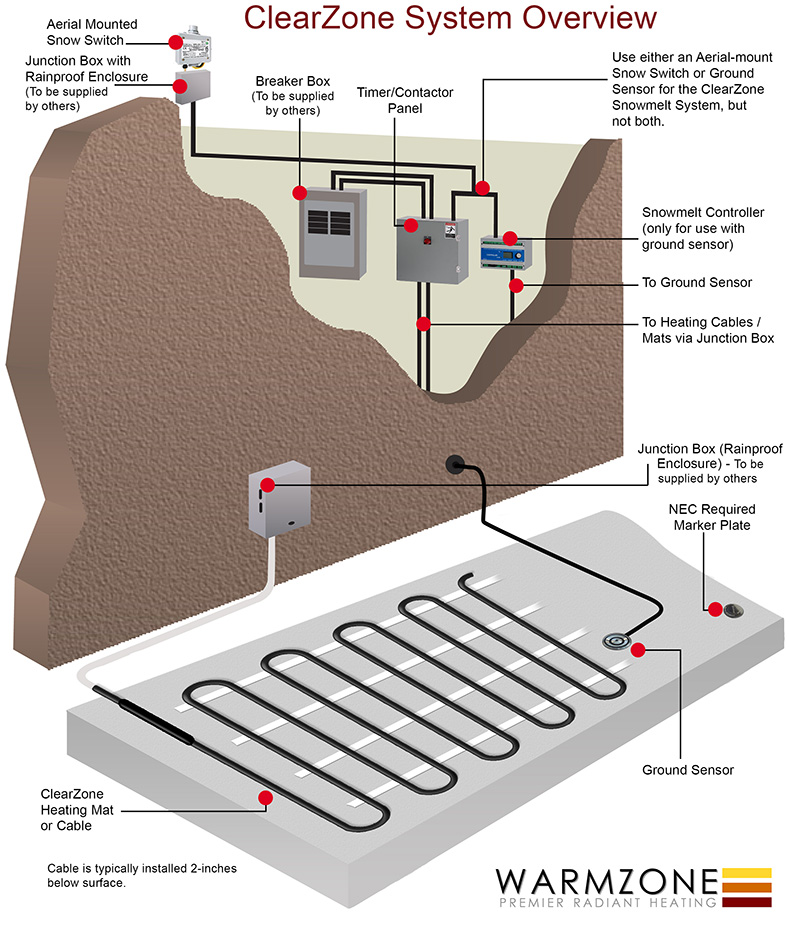
How is a Heated Driveway Installed? Whether you’re looking to install a radiant snow melting system in concrete, asphalt, or under pavers, it doesn’t take much to make a heated driveway a reality. The important thing to remember is that…
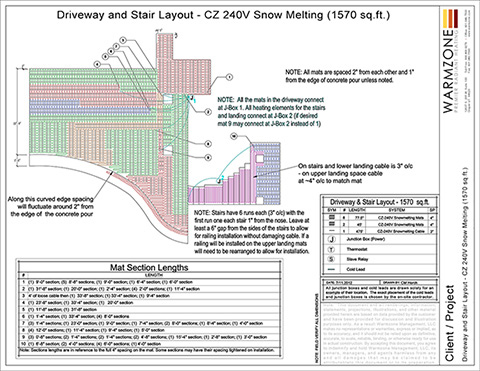
The Versatility of Radiant Snow melting Systems Because of the reliability and versatility of radiant heat snow melting systems, these solutions are proving to be popular home improvement and new construction projects. And because radiant heat systems are so easy to customize, homeowners…
While Warmzone has established itself as one of the most trusted radiant heating solutions providers in Northern America, its leadership status is not due solely to its line of renowned, proven radiant heat system components. Warmzone distinguishes itself from other…
Introduction This article is intended as a general guide to help users of snowmelt systems that utilize the ETO2 and ground sensor. For more detailed information, please refer to the Owner’s and Installation Manual. The ETO2 is an electronic controller…
Getting the Most out of Your Snowmelt System During Extreme Snow Events Your Warmzone snow melting system was designed according to ASHRAE standards, meaning it was designed specifically for typical winter conditions in your area – and then some. But…
Considering an electric radiant heated floor system for your home? Let Warmzone be your “go to” for solid solutions to your heating needs. Warmzone offers a wide variety of heating systems that are flexible enough to be installed under just…
When it comes to Roof Deicing and Gutter Trace Solutions, Remember this: Not all Roof Heating Cable is Created Equal. Beware of Cheap Local Hardware Store Heat Cable. If you’re currently shopping for a roof heating solution, don’t settle on…
We use essential cookies to ensure the site functions properly. We also use optional cookies to improve your experience. You can see our cookie policy for more information and manage your preferences.
Functional
Always active
The technical storage or access is strictly necessary for the legitimate purpose of enabling the use of a specific service explicitly requested by the subscriber or user, or for the sole purpose of carrying out the transmission of a communication over an electronic communications network.
Preferences
The technical storage or access is necessary for the legitimate purpose of storing preferences that are not requested by the subscriber or user.
Statistics
The technical storage or access that is used exclusively for statistical purposes.The technical storage or access that is used exclusively for anonymous statistical purposes. Without a subpoena, voluntary compliance on the part of your Internet Service Provider, or additional records from a third party, information stored or retrieved for this purpose alone cannot usually be used to identify you.
Marketing
The technical storage or access is required to create user profiles to send advertising, or to track the user on a website or across several websites for similar marketing purposes.